How to use Mailway with Shopify
Table of contents
This article shows how to configure your domain on Shopify to receive emails using Mailway.
Before getting started
Login in your Mailway account to add the domain you want to receive emails on.
We will use example.com as an illustration, make sure to replace it with your domain.
Configure DNS on Shopify
Login in your Shopify account, click on domains and select your domain in the Shopify-managed domains list.
On the DNS settings tab you should see (default configuration):
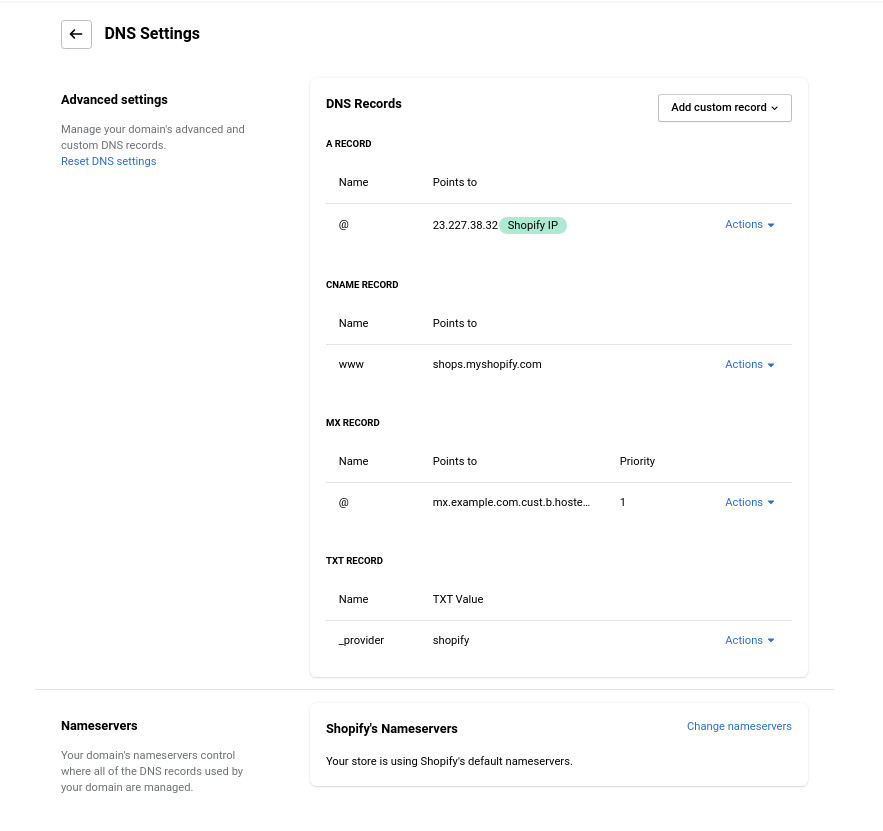
Remove any existing entries in the MX RECORD section.
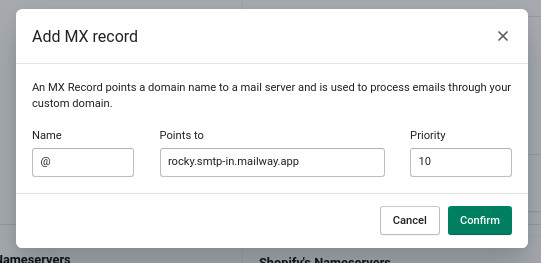
Then, click on the Add custom record:
- Select MX record
- Enter name
@to apply on the entire domain - Enter the points to you see in your Mailway account for the domain
- Leave TTL as auto
- Enter
10for the priority - Click on confirm
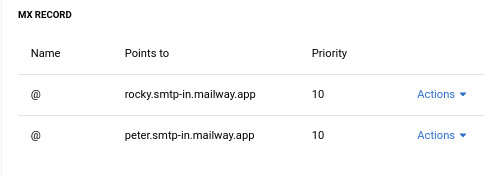
Repeat for the second mail server you see in your Mailway account for the domain.
Once you added the two MX records it should look like the following:
After you update the DNS record, it can take up to 48 hours for the changes to take effect.
Activating the domain
Go back to the Mailway dashboard and click on verify the domain’s DNS configuration.